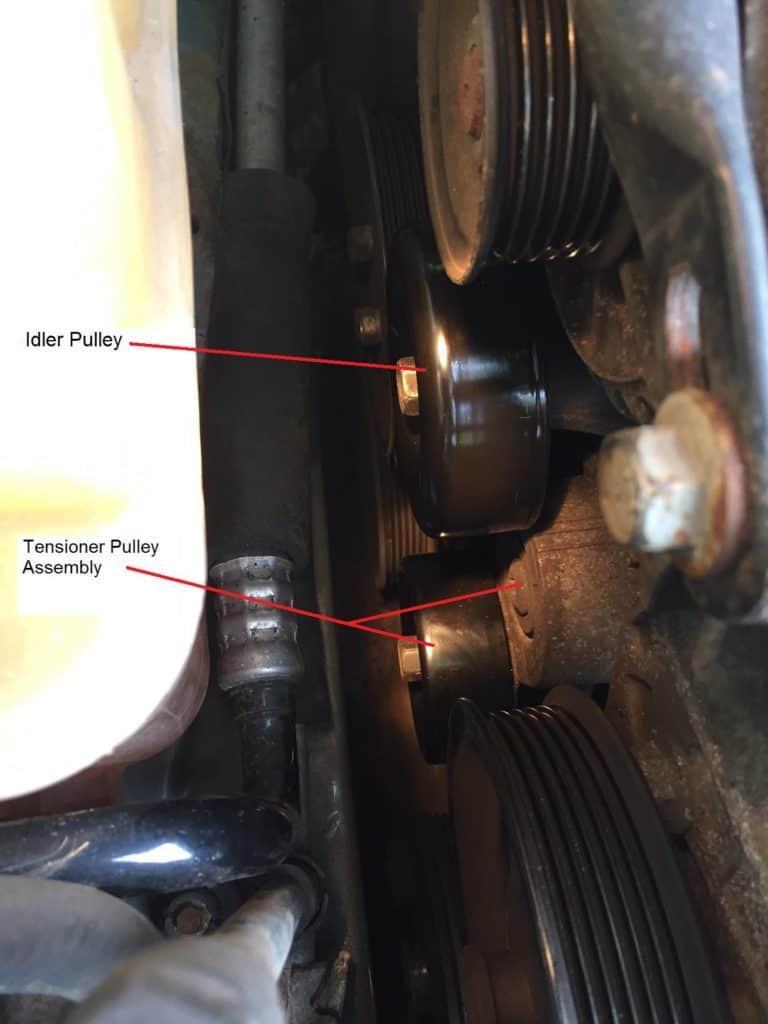
For those who would like to know how to change the serpentine belt and pulleys on a 2006 Ford Taurus, follow along. The other day I noticed my daughter’s car had a small intermittent squeak, or squeal, under the hood of her 2006 Ford Taurus. So I opened the hood and did a little investigating. It sounded like it was coming from either the serpentine belt idler pulley or the belt tensioner pulley. I also noticed that the belt itself had some cracking on the ribbed side. Although it was not severe, the car does have 110,000 miles on it, so I decided it was time to change the belt and pulleys.
DIY Cost Savings
Table of Contents
After a little research, I found out that it would cost a minimum of about $200 to have these three things changed at one of the local shops and probably even a little more if taken to a dealer. I also found out that I could purchase the parts for about $70 and the job would probably take less than an hour. Although there is a special tool for loosening the tension on the belt, this can be done by using a standard wrench.
This makes it a job that anyone, with a little mechanical ability, can do. I am only going to replace the pulley on the tensioner arm in this write-up. If the tensioner spring is damaged it can be replaced using the same steps, but instead of removing the tensioner pulley bolt, I’ll have to remove the T47 Torx screw holding the entire arm assembly. This will add about $30 to the overall cost, but that only makes for greater savings.
Tools Needed To Replace The Serpentine Belt And Pulley
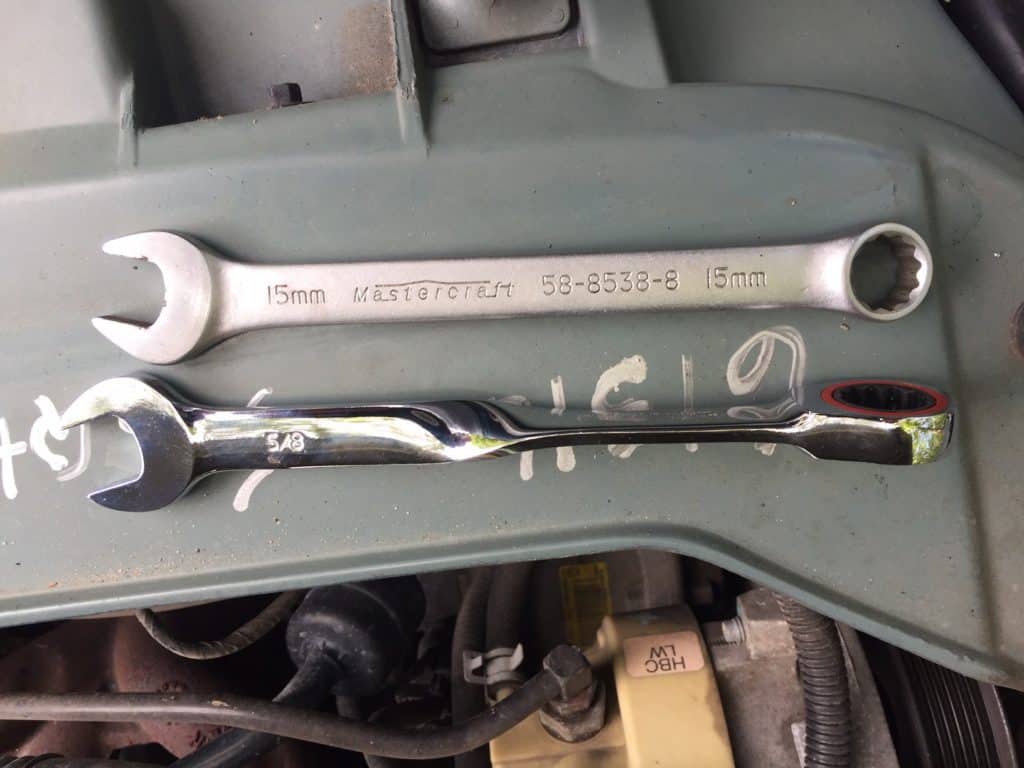
Because the car was still running fine I had some time, so in these situations, I usually do quite a bit of my parts shopping online and can save money. Once you have the parts you’re about ready to get started, but be sure to have the tools. On the Ford Taurus, both pulleys are held on by 15mm bolts. Therefore at a minimum, you need a 15mm wrench to do the job. To speed things up a 3/8” drive ratchet with a 15mm socket can be used to remove the idler pulley, but there is not enough room for the ratchet for the tensioner pulley. A ratcheting wrench works well for this.
Prepare For The Job
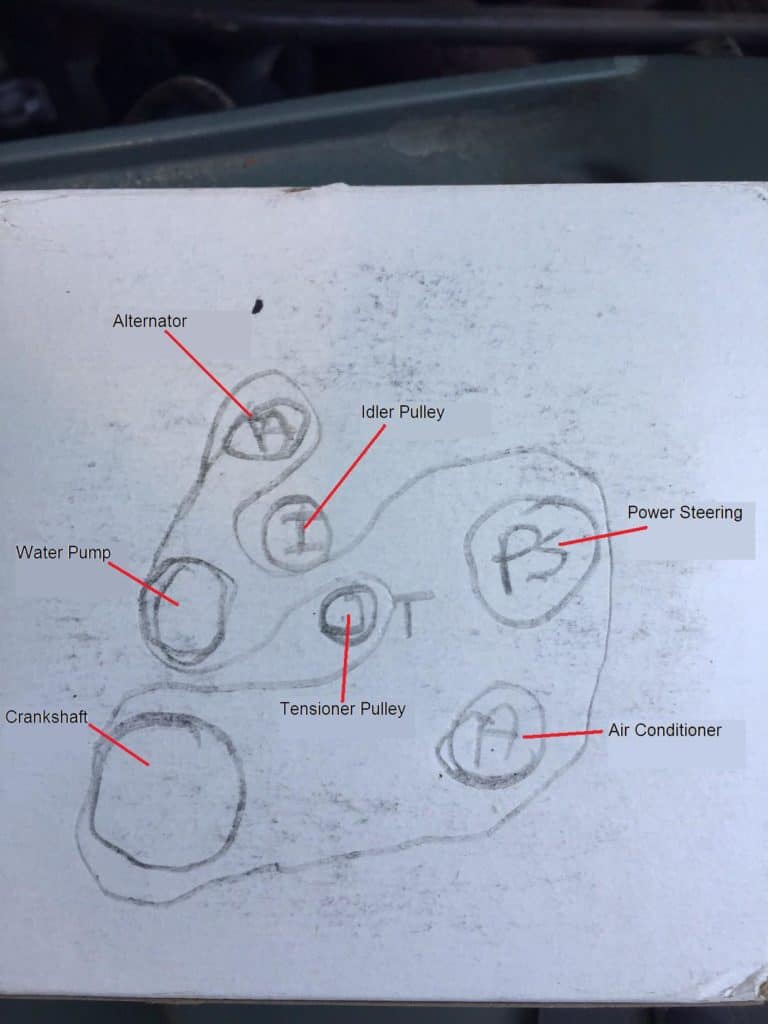
Another thing to know is how the belt fits on your vehicle. The serpentine belt weaves over and under the various engine devices (power steering pump, water pump, alternator, along with the idler and tensioner pulleys). Many vehicles have belt routing diagrams under the hood or in the owner’s manual. Make sure you find it and verify the routing before removing the old belt. The sleeve the new belt came in had several diagrams on it. Another option is to sketch a simple diagram of the engine pulleys and the belt routing on a piece of paper. That works fine too.
Safety First!
Before you start the replacement, there is one more thing to do. You need to make sure the car won’t start. The best, safest way to do this is to remove one of your battery leads. That ensures the car cannot be started. This is especially important on vehicles with remote starters. If the engine were to start while you were in the process of removing or installing the belt… a trip to the emergency room will more than likely result! For more information on project safety, read my articles on “Personal Protective Equipment” (PPE) and “Lockout-Tagout” (LOTO).
How To Remove The Belt
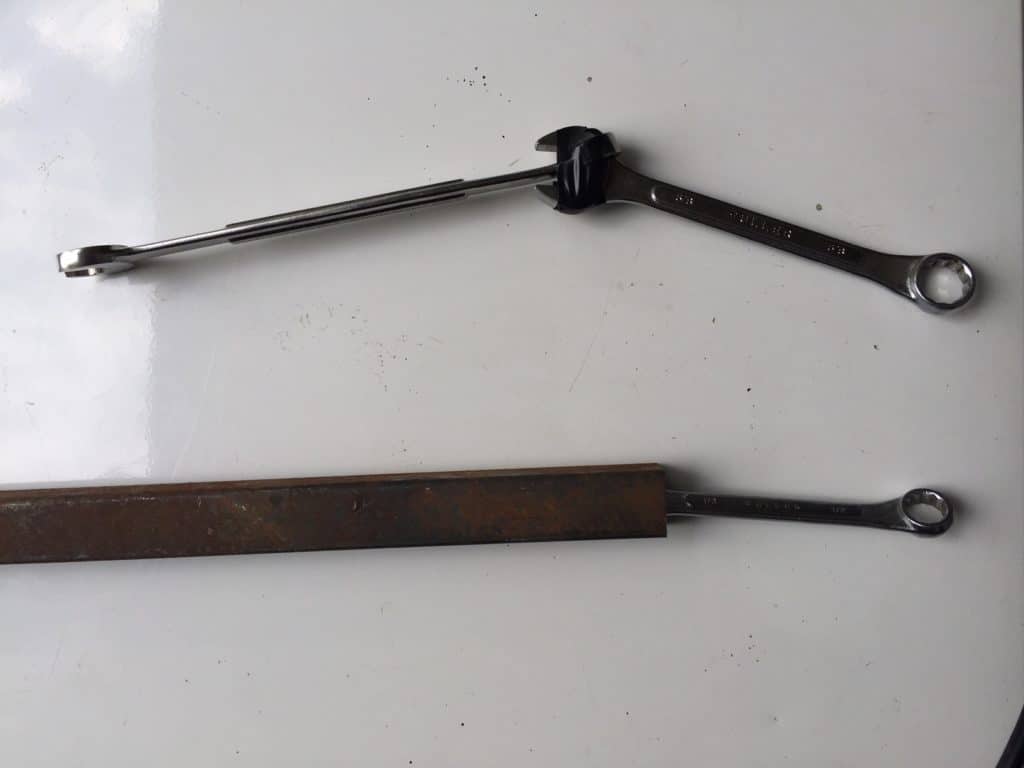
To remove the belt use a belt tensioner tool, if you have access to one, to release the tension. You can also put the 15mm wrench on the tensioner pulley bolt and rotate it clockwise. The spring in the tension arm is quite stiff, so it might require you to use a small piece of pipe on your wrench (a “cheater”) or use a double wrench to gain enough leverage. This will cause the spring-loaded tensioner arm to rotate and release the tension on the belt.
While holding the tensioner, remove the loosened belt from one of the pulleys. Once the belt is removed from one of the pulleys, you can slowly release the tensioner arm. Be aware the arm will rotate beyond the original position and could cause a pinch point on your fingers. After the arm is released, you can remove the belt from the rest of the engine pulleys and remove the old belt.
Removing the Idler Pulley
Using the 3/8” ratchet, remove the bolt holding the idler pulley bolt. The bolt may have a clip on the backside of the pulley and a washer on the front. The washer, clip, and bolt will be re-used with the new pulley. Before proceeding, verify the pulley is the correct size. Now set it aside and move to the tensioner pulley. There’s a little more room to access the tensioner pulley, while the idler pulley is removed.
Removing the Tensioner Pulley
Here’s where the 15mm ratchet wrench works well to remove the tensioner pulley bolt. I actually broke the tensioner pulley loose with the 15mm wrench, then used a 5/8” ratcheting wrench to remove the bolt. Once the bolt is out, remove the pulley and verify the new one is the correct size. This is the step that you would remove the entire tensioner pulley assembly if needed as well.
Installing New Belt and Pulleys
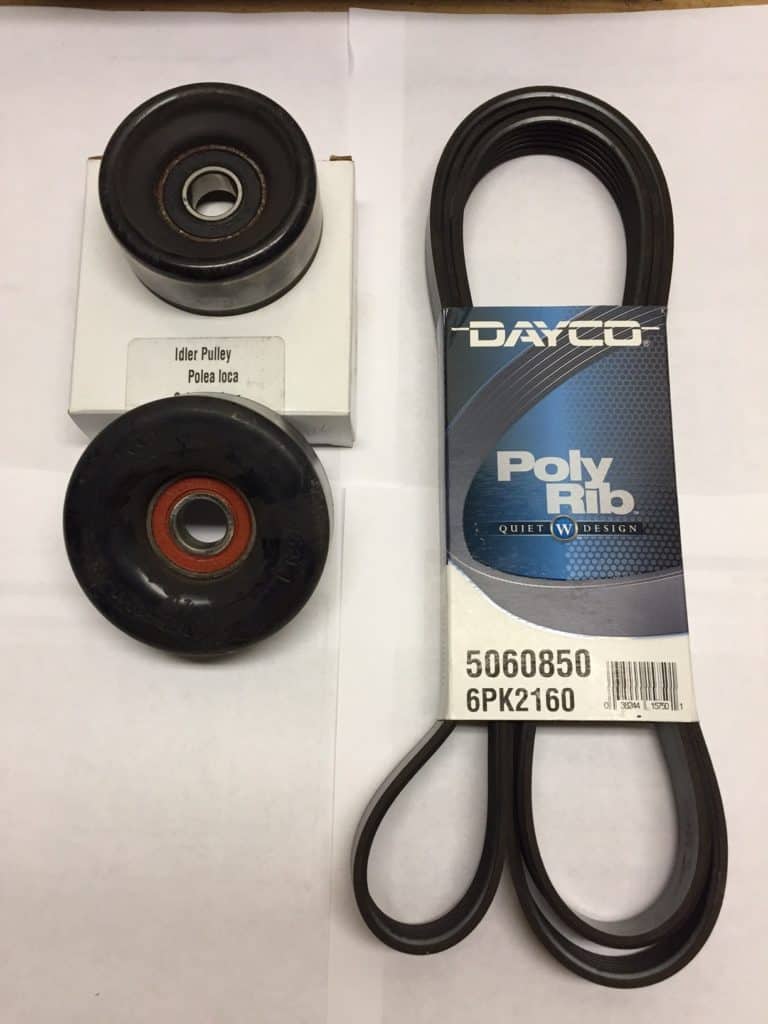
Now just install the new pulleys in reverse order. If you did use the 15mm wrench with a cheater, or double wrench, be sure to tighten the pulley bolts using only the wrench. Using a cheater, or double wrench could cause you to over-torque the bolts, which could lead to the bolts breaking. With the pulleys in place and torqued, now just install the new belt using the routing diagram or your sketch.
Before Starting Your Engine
Verify that the belt is completely on each individual pulley and routed properly. Another good practice is to remove all tools from under the hood before reconnecting the battery and starting the vehicle.
A wrench falling into the pulleys or fan blades could cause serious injury or damage to the vehicle. Start the engine and make sure the belt and pulleys look and sound good.
Conclusion
That’s all there is to it. In less than an hour, you easily saved $75 – $100 in labor and additional parts make-ups. You’ll also get a good feeling of accomplishment. This and many other vehicle repairs can be done at home, with just your basic homeowner’s hand tools and a little research.
If you have any comments or questions, you can leave them in the comments section below or you can email us at [email protected]. FYI, we do not collect or share email addresses. We will only use them to reply to your comments or provide answers to your questions. We are also required to let you know that some of our links are “affiliate links”. This means if you click on a link and make a purchase, we could make a small commission, at no extra cost to you. This helps offset the cost of maintaining our website. So, if you like what you’ve seen, please be sure to give us a “Like” and “Share” on Facebook and Instagram too. Thank you for reading and good luck with all your home projects!

