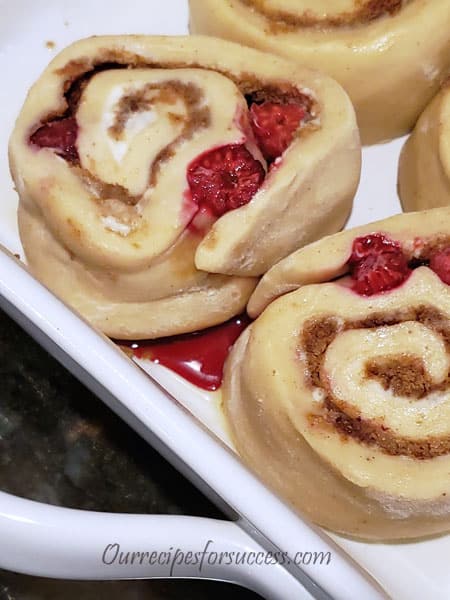
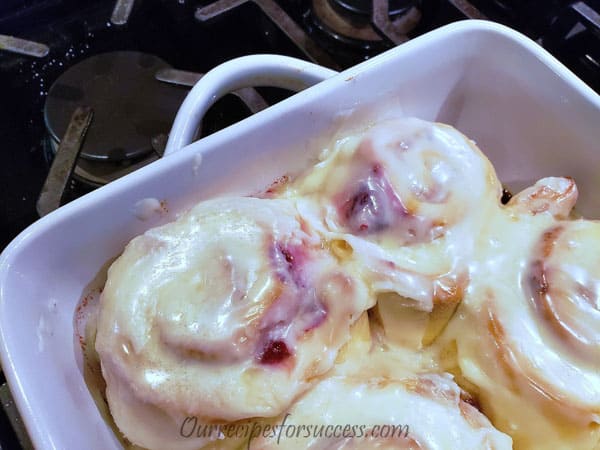
My wife Cindy’s homemade cinnamon rolls are one of our family’s favorite breakfast treats. They’re soft, gooey and go great with that morning cup of coffee. But occasionally she likes to change things up and treats us to her homemade raspberry sweet rolls recipe. Nothing says good morning like a fresh sweet roll.
In reality, raspberries are one of my wife’s favorite berries. So when they’re in season we are often treated to a host of raspberry goodies, including her raspberry sweet rolls. Actually, this sweet roll recipe can be used with any of your favorite berries or fruits. Blueberries, blackberries, strawberries, or a mixture of berries are some great alternatives. You’re only limited by your imagination.
As mentioned in our previously posted “Homemade Cinnamon Rolls Recipe”, sweet rolls, sticky buns and cinnamon rolls have been enjoyed for centuries all over the world. But now it’s easier than ever to enjoy them right in your own home anytime you want them. So we hope you give both of these recipes a try.
Raspberry Sweet Rolls Recipe
Table of Contents
Below are all the ingredients, preparation, and baking instructions you’ll need to make these delicious sweet rolls. Let’s get started.
Dough Ingredients
Raspberry Filling Ingredients
Icing Ingredients

Making The Dough
Preparing The Sweet Rolls
Baking Instructions
Preheat the oven to 325 and bake the sweet rolls until golden brown, about 35 minutes. Cool in the pan for 15 minutes.
Making the Icing
While the sweet rolls are baking, it’s time to make the icing. Follow these easy directions.
Recipe Card

- 1 cup whole milk
- 2 tsp active dry yeast
- ⅓ cup granulated sugar plus 1/4 teaspoon for yeast
- 4 Tbsp butter melted
- 1 large egg
- 1/2 tsp vanilla extract
- 3 ½ cup all-purpose flour plus more as needed
- 1 tsp salt
- 1/2 tsp nutmeg
- 2 C raspberries or favorite berry
- ⅓ C sugar
- 1 Tbsp cinnamon
- 1 tsp cornstarch
- ½ tsp lemon juice
- 2 cup confectioners’ sugar
- 1/3 cup heavy cream
- 4 Tbsp unsalted butter melted
- Warm milk in microwave 30 sec until it’s warm to the touch. Sprinkle in the yeast and 1/4 teaspoon sugar (don’t stir). Set aside until foamy, 5 minutes. Pour into KitchenAid bowl and add melted butter, egg and vanilla, mix with dough hook.
- Add remaining 1/4 cup sugar, salt and nutmeg in the bowl of a stand mixer. Add 3 ½ C of flour. Mix on low speed with the dough hook until thick and slightly sticky. Slowly add more flour, 1 tablespoon at a time, until dough pulls away from the sides of the bowl. Knead on medium speed for about 6 minutes (I remove from hook a couple of times to make sure mixed evenly).
- Remove the dough and shape into a ball. Spray butter the mixer bowl and return the dough to the bowl, turning to coat with butter. Cover with plastic wrap and let rise until doubled, 1 hour 15 minutes
- On a lightly floured surface, roll the dough into a 12-by-14-inch rectangle with the longer side facing you.
- Spread with the softened butter, leaving a 1/2-inch border on the far long edge. Gently mix all the filling ingredients together and spread evenly over softened butter.
- Brush the unbuttered far edge with water. Roll the dough away from you into a tight cylinder and press on the long edge to seal.
- Cut the cylinder with a sharp knife to make 6 equal-sized buns (or 8 slightly smaller).
- Spray butter a 9-by-13-inch baking pan; place the sweet rolls cut-side down in the pan, leaving space between each. Cover with plastic wrap and let rise until doubled, 40 minutes.
- Preheat the oven to 325 and bake the sweet rolls until golden brown, about 35 minutes. Cool in the pan for 15 minutes.
- While the sweet rolls are baking, it’s time to make the icing. Sift the confectioners’ sugar into a bowl, then whisk in the cream and melted butter. Spoon the glaze on top of the rolls while they’re still warm. Enjoy!
When it comes to making any kind of bread or cookie dough, the KitchenAid stand mixer is a baker’s best friend. We use it in tons of recipes. It takes all the work out of mixing, whisking, and kneading in many of our favorite recipes. By adding a few of the special attachments KitchenAid makes to your mixer, you can become even more creative in the kitchen. Click this link and see some of our favorite recipes we use the KitchenAid mixer for.

If you have any comments or questions, you can leave them in the comments section below or you can email us at [email protected]. FYI, we do not collect or share email addresses. We will only use them to reply to your comments or provide answers to your questions. We are also required to let you know that some of our links are “affiliate links”. This means if you click on a link and make a purchase, we could make a small commission, at no extra cost to you. This helps offset the cost of maintaining our website. So, if you like what you’ve seen, please be sure to give us a “Like” and “Share” on Facebook and Instagram too. Thank you for reading and good luck with all your home projects!


Glad you liked them. Come to think of it… we haven’t had them in a while! 😉
These were absolutely delicious! My five-year-old also seemed to love these too! He was quiet for a little too long and I found him with half the pan and a huge raspberry mess behind the couch, ha! We ended up needing to get a carpet cleaning, LOL. Either way, these were a hit! We will be making these on repeat this summer.