Doing our home electrical wiring was the most challenging home project I’ve ever undertaken. As I mentioned on the “About Us” page, I am a controls technician, so I am familiar with home electrical wiring basics and circuits. I also have a very good understanding of wire current ratings and general, good wiring practices. Although I felt I had the knowledge to do the work, I was concerned about the time it would take to do it while working full time. I also had to be sure I could meet all the electrical codes and requirements. After reviewing the quotes to have the electrical work done, my wife convinced me to go for it!
Preparing
Table of Contents
Once I decided I was going to take on the job, I had a couple of months to do further research, before construction began. At that time I purchased several “how to” and best practice books, for residential wiring. I did some research and I found two highly rated “how to” books that contain many home wiring best practices that I followed when wiring our house. These books are “Wiring Complete: 3rd edition” and “Ultimate Guide, Wiring“. Both of these books are reasonably priced and either one would be a great addition to any DIY’er library!
I also began reviewing the NEC codes (National Electrical Code). The full NEC codebook can be a bit overwhelming, for beginners (including me), because it covers all aspects of electrical codes for both residential and industrial applications. There are books available to help you understand the residential NEC codes. I highly recommend purchasing one of these books! One example of such a book is “Code Check Electrical: An Illustrated Guide to Wiring a Safe House”. This book will not tell you how to wire a 3-way switch or a GFCI outlet, but it will tell you where each of these devices is required in your new home, or remodeling project. Either of the two books mentioned above will with any of the “how to” wiring questions.
There are other good resources to get electrical permit information, for the state of Michigan, online. I’m sure other states have similar sites, so don’t be afraid to use them. Other good sources are to talk to that electrician friend or meet with your local electrical inspector. That’s a good time to discuss specific codes you may have questions about. Above all else, make sure you know and understand the electrical codes and follow them. They’re there to protect you and your family!
Get Started Early
Starting early allows you to purchase supplies spread out over a couple months. We started buying spools of wire that we would need, along with receptacles, switches and light fixtures. This allowed us to shop for the best prices on the supplies; especially the more expensive items like electrical distribution panels, breakers and ground fault receptacles. By spreading these purchases out over time, we were able to purchase a lot of these items out of pocket. This helped reduce the amount we had to finance. It can also allow you to spend up on some light fixtures or other appliances, without feeling too guilty.
Time For Planning
The single biggest thing I did that helped in the installation was to create a diagram of where “we” wanted every light fixture, light switch, receptacle, appliance, smoke detector and electrical do-dad located in our home. This will help with a count on the materials you’ll need too. Think big here folks!!
Power Needs
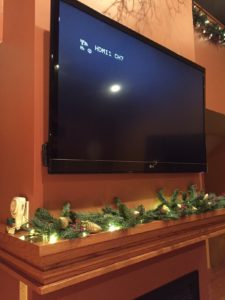
Might you ever want a big screen TV hung on the wall somewhere? Be sure to put an outlet there. Would an extra outdoor receptacle be nice, over there, for entertaining? Install it now! Literally, take your wife, significant other or friend and go room by room and make note of where you want, or might want, everything. Explore how you may want to re-arrange the furniture in the future. You’ll want outlets for lamps, clocks, and chargers, for a host of electronic toys, no matter how you arrange your furniture.

And don’t forget the lighted wreaths, garlands, and assorted decoration for the holidays. What about the outdoor decorations? If only Clark Griswold would have known this, it would have saved him a lot of grief! Seriously, by doing this you can eliminate, or at least significantly cut down on, the use of extension cords you’ll use around the house. Extension cords can make an area look messy and they can present a safety hazard in a few different ways. They can be a tripping hazard when strung across a room or the yard. If you overload them, they can be a fire hazard and they can also represent an electrical shock hazard. Remember the poor Griswold cat?!

Automation/Entertainment
Ever consider “home automation”? Do your research and install what wiring you can now. Are you going to have, or need, a home office? Consider running a dedicated ethernet and/or phone line. I know we’re in the age of cellular and wireless communications today, but “hardwired” connections can offer a more secure connection for some business needs. Then there’s home entertainment. Flat screens TV’s. Ceiling mounted projectors, with motorized screens. Surround sound audio systems. Now’s the time to use your imagination. Think ahead and think big!
Permits
Building a house requires many permits. If you choose to do the electrical work yourself, you’ll be responsible for obtaining the electrical permit. A homeowner doing the electrical work on their own home is permitted to apply for the permit and do the work. Understanding the codes and having a plan will be useful when applying for the permit. Your electrical inspector should work with you on any questions you have and help you fill out the permit. This is the link to the Michigan Electrical Permit Application, so you can see what kind of information is required to get started. Being prepared helps speed the process up and can help build a good rapport with the inspector.
Construction Begins
With the diagram you’ve created for each room, you’ll want to determine where to mount your distribution panel. The panel needs to be readily accessible and should be mounted where the commercial power enters your home, near the meter socket. This keeps the length of the unprotected feed conductors from the power company to a minimum. If you need to locate your distribution panel more than 30 feet away from the entry point, discuss this with your electrical inspector. There are some restrictions and you may need to take extra precautions. From that point, you can start planning on how you’ll route the wire from each room back to the distribution panel. This can begin as soon as the house is roughed in.

Another very important thing to do, before you begin planning your route, is to talk with all the other “mechanical” sub-contractors. This mainly includes the HVAC (heating & cooling) and plumbing. The electrical installations can be somewhat flexible, whereas the other mechanical installations have much less flexibility. You’ll have far less conflict and issues if you let the others establish there routes first. Then you can run power to their equipment and easily work around them, as you complete wiring the house.
Tools Needed
Many of the hand tools you need to complete this job may already be in your toolbox. I did purchase a couple items for this job and I have used them many times since. The first was a good quality leather tool belt. It was great for carrying most of my other hand tools, wire nuts, electrical tape, among other things. The second item was a good pair of lineman’s pliers. These were perfect for cutting and twisting wires together. Other items like an electric screwdriver are great for installing receptacles and switches into boxes. There are a lot of screws and this can be a big time saver.
You’ll also need a 1/2” drive electric drill and 3/4” drill bit for drilling the holes in the stud walls and floor joists. At the time I wired our house I bought a 1/2” Craftsman variable speed drill. This drill had enough power for the job and was a great investment. I drilled out our entire house and have used it to mix multiple batches of mortar and cement and it is still going strong. As for the drill bit, I was able to complete the job using a couple paddle/spade bits. Another good option is an auger bit. They are a little more expensive, but my understanding is they are a little more rugged. The bits will need to be short enough so the drill and bit will fit between the studs. A longer drill bit will be needed in areas where multiple 2×4’s are nailed together too.
You Will Need Help
Taking this job on will require enlisting some help. Hundreds of holes have to be drilled in the stud walls. Dozens of electrical boxes need to be mounted and hundreds of feet of wire have to be pulled. Much of the beginning work does not require expert help. By following the room diagrams and wire routing, you’ve created, the boxes can be mount and holes drilled by anyone capable of using hand tools. You’ll definitely need help pulling wire. Someone guiding and feeding the wire being pulled is invaluable! On long pulls, a second person is helpful at times.
Be sure to work safely while completing these tasks. I highly recommend wearing safety glasses, hearing protection and gloves, while working. Please consider reading my articles on safety and lockout – tagout when doing home projects.
Inspection
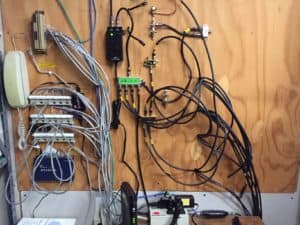
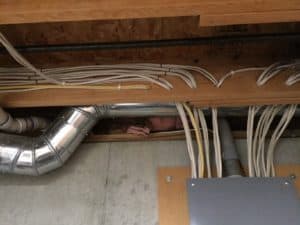
The first inspection you’ll get is the “rough-in” inspection. The inspector checks the wiring, boxes, meter socket, and distribution panel to make sure all the components are installed to code. Prior to the inspection, I made a video of all the wiring throughout the house. I went room to room describing each circuit and how it was routed. This was a great way for me to double check my work. Some of the photos in this article are a little fuzzy because they are photos I captured from the VHS video I made back in 1999! I’m using them to illustrate a few things to consider.
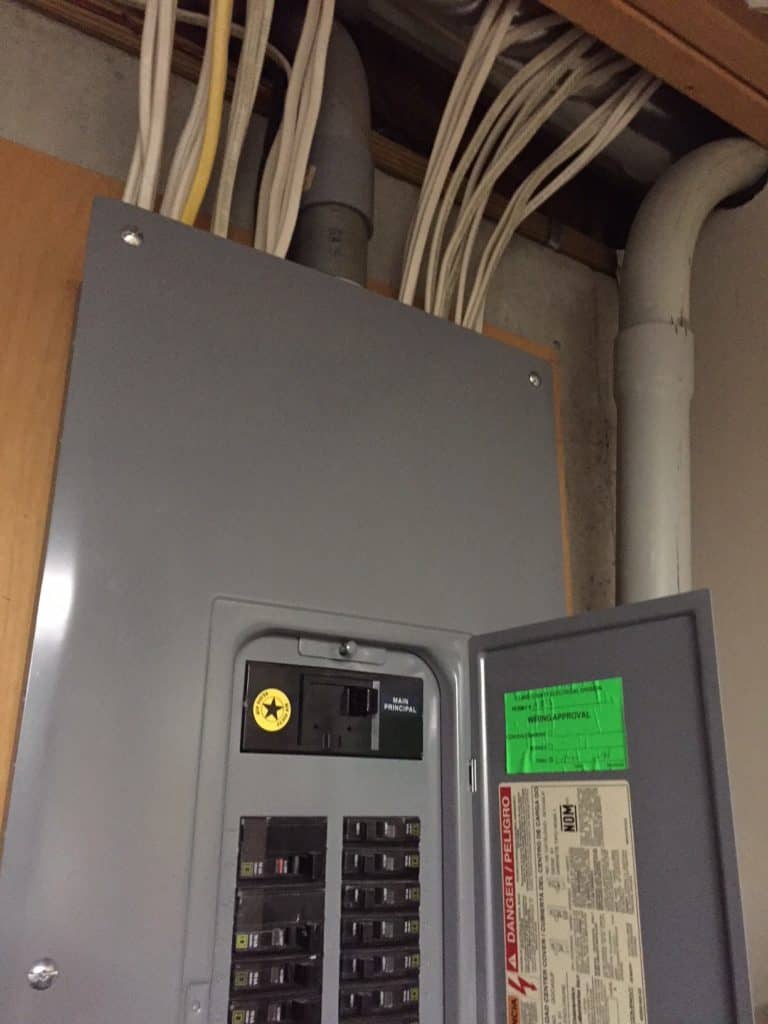
I’m not sure how important it is to keep things neat and tidy, but during my inspection, the inspector commented on this. Not only did it make me feel good, but I also hope it gave him a certain level of confidence that I paid attention to detail. During the inspection he’ll be looking for all the code related items, so be sure to do your research and do a professional job. All these things will help you get that “green sticker” (approval sticker)!
After The Drywall
After the inspection, the drywallers can finish the walls and ceilings. Now its time to make the final terminations on all the switches, receptacles, ceiling fans, dishwashers, and light fixtures. I’d like to recommend reading our article on The Best Way to Wire a Receptacle. It provides some “best practice” wiring tips that can be applied to wiring switches, light fixtures, and other electrical equipment. There’s still a lot of work, but you can really start seeing progress and know the end is near. There is still the final inspection, but that’s pretty straightforward. Once the job is complete, there is such a great feeling of accomplishment.
As with any project, planning and preparation are the keys to successfully completing them. A job of this size takes a little more effort but can save you thousands of dollars. We ended up with a custom electrical installation, specific to our wants and needs, and did not have to pay extra to have it done. With a little help, some hard work, and commitment, you can also do this! Good luck with all your future projects.
If you have any comments or question, you can leave them in the comments section below. You can also email us at [email protected]. FYI, we do not collect or share email addresses. We will only use them to reply to your comments or provide answers to your questions. If you liked what you saw, please be sure to give us a “Like” and “Share” on Facebook and Instagram too. Thank you for reading and good luck with all your projects!


Well said!
Great post! DIY electrical wiring can be a rewarding project for those who are comfortable working with electricity and have the right tools and knowledge. However, it is essential to follow proper safety protocols and procedures to avoid injury or damage to your property. Some important DIY electrical wiring tips include turning off the power supply, using the right tools, following manufacturer instructions, and properly grounding wires. It is also crucial to obtain any necessary permits and inspections from local authorities to ensure that your wiring project meets safety standards. With the right preparation and caution, DIY electrical wiring can be a successful and satisfying project.
I’m glad you found it helpful. There are many small repairs and replacements the average homeowner can do. It just requires doing a little research, a few tools, and working safely.
This is really helpful for those of us who are looking to do our own electrical work around the house. I like that you provide clear instructions and also remind us to be careful when working with electricity.